
Last week I wrote about a road trip I made to West Virginia and how a map of ancestor burials I plotted on Google Maps reminded me of the nearby graves of my sixth great-grandparents Anthony and Margaret (Messersmith) Rosenberger.
Whether tracking burials, births, marriages, or even homesteads, Google Maps is an essential tool for the family historian. Below is an easy-to-follow 12-step process for creating your own genealogy map. Click on any of the images to enlarge them.
Step 1: Load Google Maps at https://www.maps.google.com/maps and click on "Sign In" in the upper right hand corner to log in to your google (Gmail) account.

Step 2: Click on the three horizontal bar "Menu" icon on the left hand side of the screen. This will open up the Google Maps menu.

Step 3: Select "Your Places" from the Google Maps menu.

Step 4: Click on the "Maps" option on the far right hand side of the menu.

Step 5: A new map will be created that is ready for you to personalize. Click on "Untitled map" and rename it. For example, "Ancestor Burials".

Step 6: You can also provide a description of the map. For example, "A map of all of my ancestor burials." Hit save.

Step 7: Search for a cemetery (or other location that you are plotting) and select it from the drop down menu.

Step 8: After selecting your cemetery from the search menu, click "Add to map".

Step 9: Click the pencil icon to add information about your ancestor(s) buried in the cemetery.

Step 10: After adding the names for your ancestor burials, hit save.

Step 11: In the menu on the left, place your mouse near the cemetery name and click on the paint can to make additional edits.
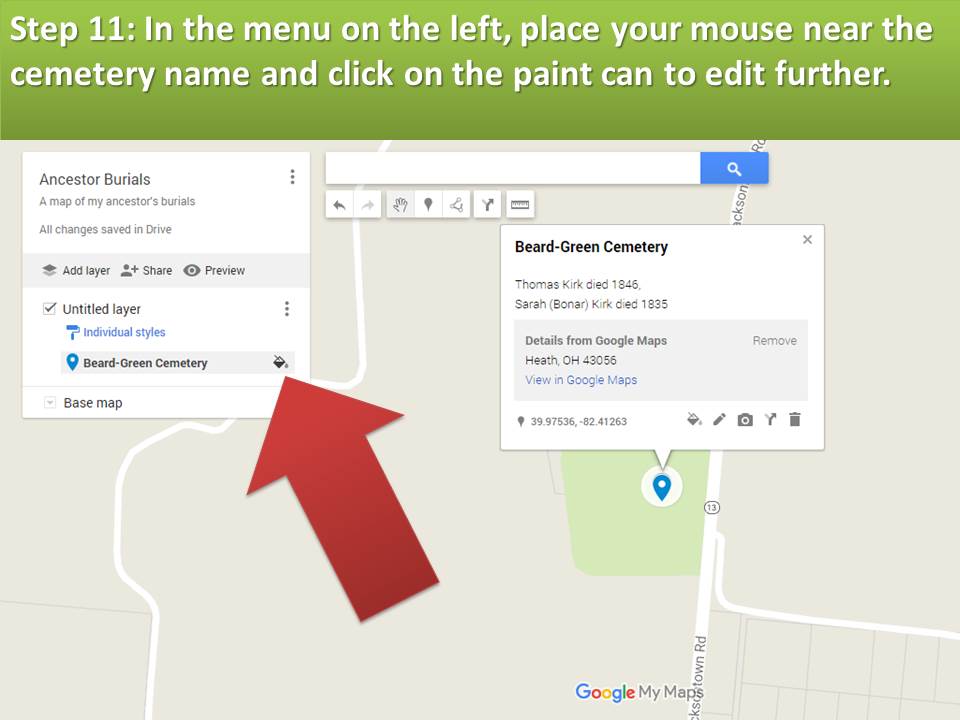
Step 12: This will open a menu that allows you to change the color or even the icon for the marker that plots the cemetery on your map. For example, I changed my icons to be a yellow flower.

After making all edits, you're ready to add more locations to your map. Return to Step 7 and repeat the process until you've added all of your desired locations. The map saves in real time and will be in your Google Maps archive for future reference.
Happy plotting! Here's to successful family history road trips.
Michael,
ReplyDeleteI want to let you know that your blog post is listed in today's Genealogy Fab Finds post at http://janasgenealogyandfamilyhistory.blogspot.com/2017/07/janas-genealogy-fab-finds-for-july-7.html
Have a great weekend!
Jana, thanks a bunch for sharing the post. I really appreciate it and all you do to educate and grow the genealogy community.
DeleteIn step 1 instead of https://www.maps.google.com/maps, just use https://maps.google.com or https://www.google.com/maps
ReplyDeleteBoth work, are shorter, and don't complain about certificate problems which happen while it rerouted you from the longer version you mentioned.
I don't get any certificate errors, but good tips. Thanks for sharing.
DeleteThanks for this great blog post! I will be making a map with all my ancestors gravesite especially around New England. I also plan to make a map of my families homes where they lived.
ReplyDeleteFantastic! Let me know how they work out, Jean. Good luck!
DeleteThis was a fun exercise. I didn't realize I could do that in Google maps. I'll be playing with this further!
ReplyDeleteGreat! Happy mapping, Susan!
DeleteExcellent suggestions! Thanks for the tips.
ReplyDeleteYou bet, Amy. Good luck!
DeleteExcellent! I must remember this tool for future use. Thank you.
ReplyDeleteLet me know if you give it a go and how it works out, Dara.
DeleteI loved this. I love anything to do with mapping family history.
ReplyDeleteThat makes two of us, Susi. :)
DeleteHow do you retrieve the map for viewing once it is saved?
DeleteGreat question! Head back to the Google Maps webpage. Make sure you're logged in to your Google account (your profile log-in access is on the upper-right portion of the screen). Once you're logged in, click on the three horizontal (hamburger) menu on the left-hand side. Scroll down and click on "Your Places". Then click on Maps and select the map you've just created.
DeleteHarder to do when using the Pro version. I use the Pro version of Google Earth and mark the places an ancestor lived. I then go to Street View and take a picture of the place. In urban areas the home is either still there (for more recent ancestors) of it's gone.
ReplyDeleteGreat approach, Bob. I like the street view photo recommendation. That’s a keeper!
Delete